Tip 1: Preparing for Success Before diving into the application process, it's vital to prepare the surface properly. Cleanliness is key to ensure optimum adhesion and longevity of the sealant. Begin by thoroughly cleaning the surface, removing any dirt, grease, or loose particles. Utilize a mild detergent or a surface cleaner to wash the area, and be sure to rinse and dry it completely. Additionally, if there is existing silicone sealant, it must be completely removed before applying a new layer for improved adhesion.

Tip 2: Mastering the Application Technique Using the right technique during the application of silicone sealant is crucial to achieving a professional-looking finish. Here are the key steps to follow:
a) Prepare the nozzle: Cut the nozzle of the sealant tube at a 45-degree angle. This angle helps create an appropriate-sized opening for precise application.

b) Load the sealant tube: Load the silicone sealant tube into a caulking gun, ensuring it is secured firmly. Hold the gun at a 45-degree angle and position it close to the joint or surface you wish to seal.
c) Apply the sealant: Apply even pressure on the caulking gun's trigger to release a steady bead of sealant. Keep the gun's speed and angle consistent throughout the application process to maintain a uniform bead. It's advisable to start at one end of the joint or surface and work your way to the other, applying the sealant in a continuous motion.

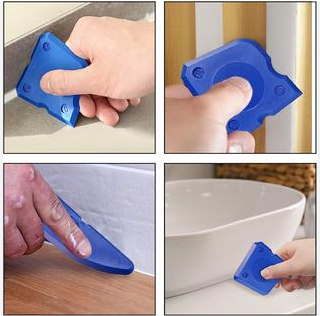
d) Smooth the sealant: Once the bead is applied, smooth it immediately using a caulk smoothing tool, a plastic spoon, or even a wet finger. This step helps achieve a neat finish and proper adhesion. Keep a damp cloth or sponge nearby to wipe away any excess sealant and ensure clean lines.

Tip 3: Allowing Adequate Curing Time To ensure the sealant's effectiveness, it is crucial to allow sufficient curing time. The curing time may vary depending on factors such as humidity, temperature, and the thickness of the applied sealant. As a general rule, it is recommended to allow at least 24 hours for the sealant to cure fully before exposing it to water or subjecting the joint to stress. Consult the manufacturer's instructions for specific curing time recommendations.
Conclusion: With these proper application techniques in your arsenal, you can confidently tackle any sealing or bonding task using silicone sealant. Remember to prepare the surface diligently, load and apply the sealant with precision, and allow adequate curing time for optimal results. By mastering these techniques, you'll achieve professional-looking seals that provide durability and maintain their integrity over time. So, go ahead and unleash your DIY prowess, armed with the knowledge to excel in the art of silicone sealant application!